

Greetings All,
PythNutD back with another RRT hobby article. Took a bit of a break this November, but got my RRT energy back and I'm back to assembling, painting, and blogging.
I've had multiple people across the various forums request that I put up some articles talking about assembly of the various RRT models. Well now that the remainder of my Pledges are in hand I certainly will have plenty to assemble. Now onto the first part of what will become a multi-article series, specifically in this article I show how I assemble the Veritech models, and a destroid thrown in for fun.
Enjoy
Phalanx Destroid:
Seems like most people have had the most trouble with assembling the Veritech models but as I was just about to put together the Phalanx minis from my Battlecry that's where I started.
1) Sprue Review and Pre-Planning: Before I cut I pieces from a sprue for the first time I take the time to review the sprue to see where the parts are located, and think about how to put the mini together.

2) Cut and Clean: The first step in every assembly of a mini is to remove the parts to be used from the sprue and clean off the flashing and extra plastic where the pieces attach to the frame. I also tend to take the time to see how the halves fit together and place halves together.

Methods to clean the pieces prior to assembly:
A. Cutting/Trimming: To cut off extra plastic left over from the frame gently cut through the piece with the blade edge pointed away from you and cut away from yourself. It is important to note that you HOLD the piece in your hand, the picture shown is just to highlight the angle and direction I use to trim pieces.

B. Scraping: To get rid of flash and to smooth out a surface I scrape the exact blade across the surface gently. When scraping the blade edge is aimed towards yourself and you scrap across the surface way from yourself. It is important to note that you HOLD the piece in your hand, the picture shown is just to highlight the angle and direction I use to trim pieces.

3) Assembling major parts: After the pieces are cleaned I start by gluing together the parts that make up halves of a whole piece. I use Testors Cement for Plastic Models 3501and apply it to the edges with an old brush. IF you apply to little the bond will be weak, but if you apply to much it will pour out as you push the halves together leaving extra glue along the surface.
Before I move on I let the glue dry and carefully cut extra glue off and then scrape any surfaces where the two halves come together but don't perfectly align. This will smooth out the edge to make it appear as a continues part.

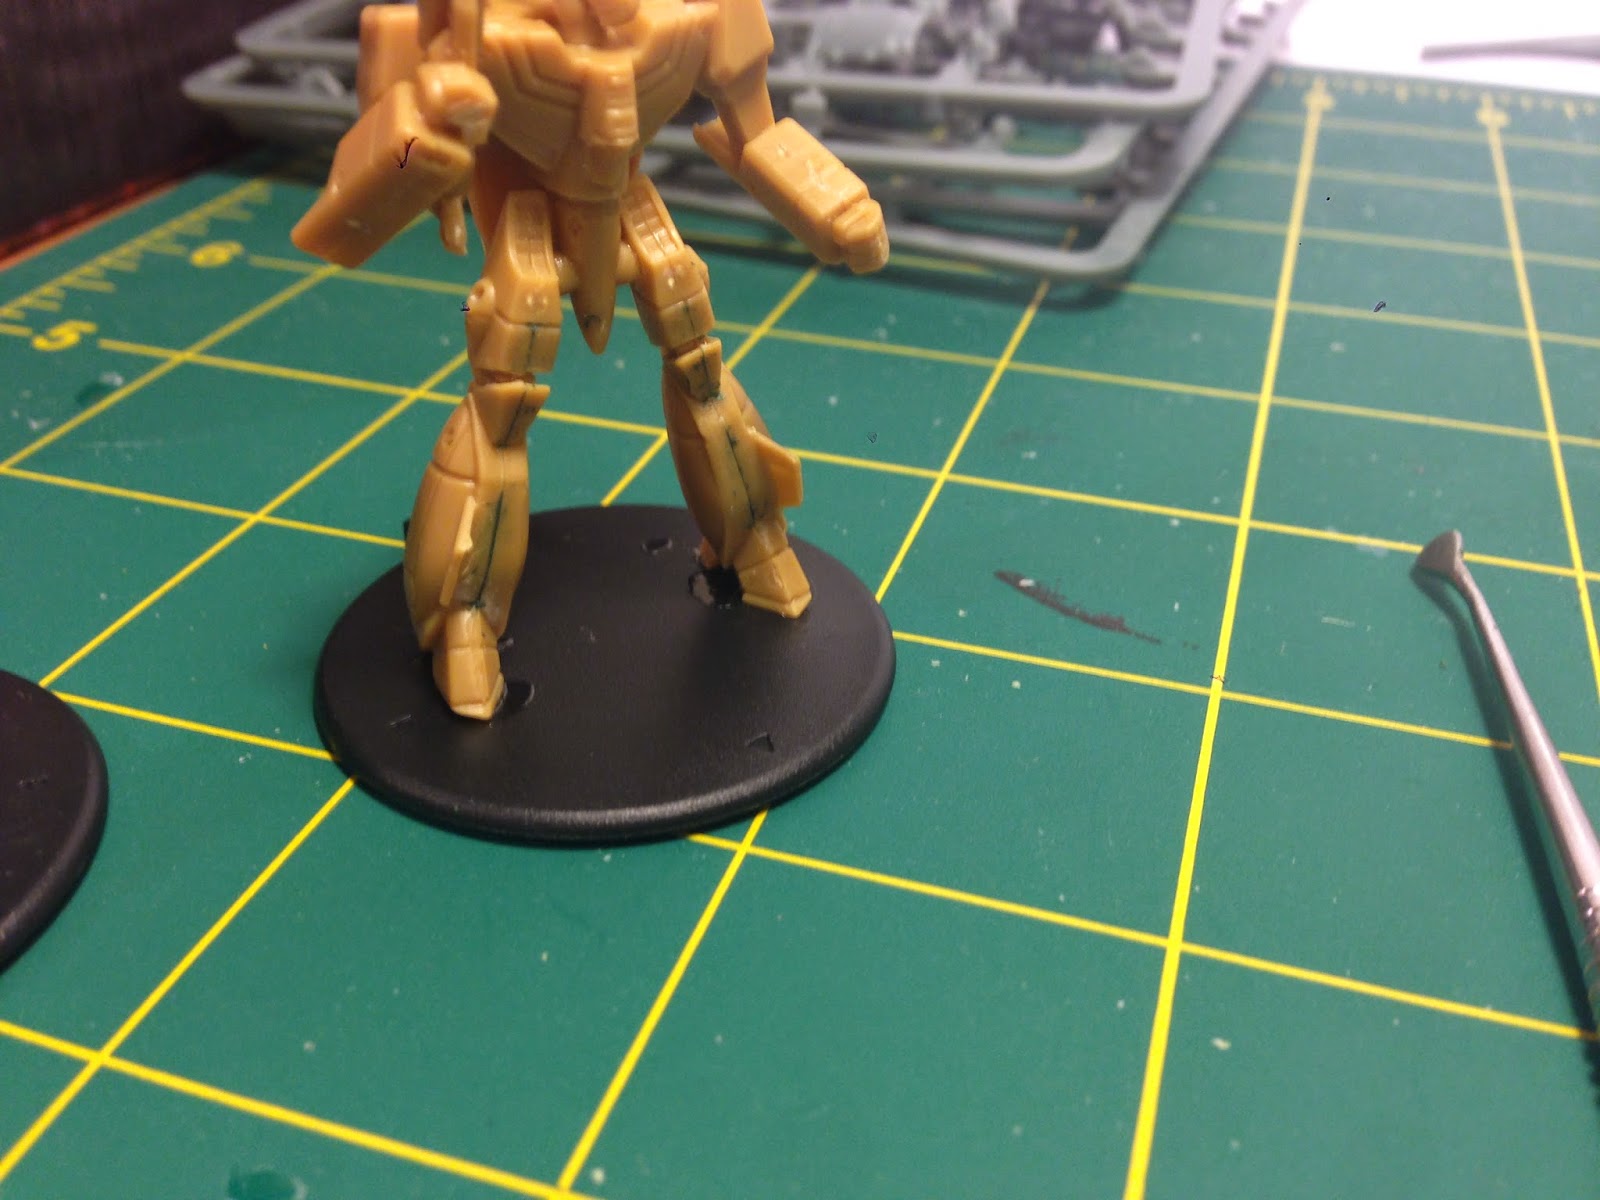
4) Body and Legs: Next I glue the hip/lower body to the upper body and glue the feet to the legs. The Phalanx (as with the other destroids) has two feet/leg options, strait and slightly walking. Before I glue them together I place them together to make sure they fit.

5) Attaching Legs to Body: Next I hold the legs to the body and while holding them test stand them on a base to see how they fit. Next I apply the glue to the hips and place the legs on, after a few moments I stand the mini on the base and adjust the location of the legs to stand properly. I then place some cement on the feet and place the mini back on the base.

6) Missile Pod Face: Next I placed the face on the missile pod and after waiting a bit I cut and scraped the extra glue off. Then I glue the Pods onto the body.

7) Fine Details: Next I placed the side pieces on the upper leg, placed the cockpit canopy on the top of the upper body, placed the missile pod hatch on the pod, and then placed the last piece on the top/back of the model.
And Done.

Veritech Battloid:
1) Sprue Review and Pre-Planning: Before I cut I pieces from a sprue for the first time I take the time to review the sprue to see where the parts are located, and think about how to put the mini together.
A. Arm and Gun Options: As part of my review I noticed that the different arm options (4 on the sprue) are placed together as shown below. The forearm that holds the gun on the right side is flat and the forearm that attaches to the left has a round bump or is the fist/pointing hand.
You can take a look at my sketch below to see where the heads, legs, and cockpit go.

2) Cut and Clean: The first step in every assembly of a mini is to remove the parts to be used from the sprue and clean off the flashing and extra plastic where the pieces attach to the frame. I also tend to take the time to see how the halves fit together and place halves together. I cut off the large extra pieces and scrape off the flash.
I have noticed that the models have little flash as the mold lines seem to have been aligned on the edge of pieces that are halves of a whole.
Keep the arms separated cause if you don't you will end up with arms that don't fit right during assembly.

3) Assembling major parts: After the pieces are cleaned I start by gluing together the parts that make up halves of a whole piece. I use Testors Cement for Plastic Models 3501and apply it to the edges with an old brush. IF you apply to little the bond will be weak, but if you apply to much it will pour out as you push the halves together leaving extra glue along the surface.
Before I move on I let the glue dry and carefully cut extra glue off and then scrape any surfaces where the two halves come together but don't perfectly align. This will smooth out the edge to make it appear as a continues part.
I glued the hip and head to the torso before the next step

4) Legs and attaching to the Base: Before I glue anything I hold the legs to the body and hold the whole thing to the base to make sure the legs are aligned correctly and are meshed well.
I put glue on the hip piece and attach the legs next. After a few moments I glue the whole model to the base. For the back bent leg I glued a rock to the base and placed the model so the back foot was on top of the rock.
For more Dynamic leg options see my old post on the subject here.

5) Forearms: Next I placed the Forearms on the Shoulders, as with the legs I hold the pieces together to make sure they fit before I glue them.

6) Gun hand: Next I glue the gun to the right arm. The Gun has grooves that fit perfectly on the arm.

7) Right arm: Next I glue the right arm to the body. The back of the gun has a groove that aligns to the body.

8) Left Arm: next I glue the left arm to the body and wrist.

Two models done

Extra: Green stuff the gap
A. I paint liquid green stuff into the large gaps and then let it dry for two-five minutes.

B. Next I use a green stuff molding tool to scrap the extra green stuff from the body leaving the gaps filled.
Veritech Guardian:
1) Sprue Review and Pre-Planning: Before I cut I pieces from a sprue for the first time I take the time to review the sprue to see where the parts are located, and think about how to put the mini together.
A. Arm and Gun Options: As part of my review I noticed that the different arm options (2on the sprue) are placed together as shown below. The forearm that holds the gun on the right side is flat and the forearm that attaches to the left has a round bump or is the fist/pointing hand.
You can take a look at my sketch below to see where the heads are and missile options.

2) Cut and Clean: The first step in every assembly of a mini is to remove the parts to be used from the sprue and clean off the flashing and extra plastic where the pieces attach to the frame. I also tend to take the time to see how the halves fit together and place halves together. I cut off the large extra pieces and scrape off the flash.
Keep the arms separated cause if you don't you will end up with arms that don't fit right during assembly.
3) Assembling major parts: After the pieces are cleaned I start by gluing together the parts that make up halves of a whole piece. I use Testors Cement for Plastic Models 3501and apply it to the edges with an old brush. IF you apply to little the bond will be weak, but if you apply to much it will pour out as you push the halves together leaving extra glue along the surface.
Before I move on I let the glue dry and carefully cut extra glue off and then scrape any surfaces where the two halves come together but don't perfectly align. This will smooth out the edge to make it appear as a continues part.
Before I move on I let the glue dry and carefully cut extra glue off and then scrape any surfaces where the two halves come together but don't perfectly align. This will smooth out the edge to make it appear as a continues part.

4) Flight Stand: Since I don't plan on using the stand that comes on the sprue, opting for a clear acrylic flight stand I drilled a small hole on the bottom of the body before I placed the legs. I also glued the missiles together.

5) Legs to body and Forearm to upper arm: Next I glue the legs to the body, making sure to test the fit before I glue. I also blue the forearms to the upper arms, as with the battled the flat forearm is the right arm and the rounded end goes on the left.
I also glue on the heads to the body.

6) Gun to forearm: Next I glue the gun to the right arm, as with the battled the grooves on the gun fit the forearm.

7) Arms to Body: Next I glue the Right arm to the body and then the left. With the arms that cross to hold the gun I don't wait long to glue the other arm on so I can adjust the locations before they dry.

8) Missiles: Next I glued a set of the standard wings and the MLOP to the wings. A little of both for flexibility.


Veritech Fighter:
1) Sprue Review and Pre-Planning: Before I cut I pieces from a sprue for the first time I take the time to review the sprue to see where the parts are located, and think about how to put the mini together.

2) Flight Stand: Since I don't plan on using the stand that comes on the sprue, opting for a clear acrylic flight stand I drilled a small hole on the bottom of one leg before I placed the legs. I also glued the missiles together.

3) Bottom pieces: Next I glued on the legs, head, and the gun pod.

4) Wings: Next I glued the main wings and the rear wings to the body. As with the other parts I pre-test the pieces before I glue to make sure I am putting them in the correct location and angle.

5) Missile Pods: as with he Guardian I glued the missiles and MLOP to the wings

Thanks For Reading......
Next Up Zentraedi assembly and UEDF Assembly Part 2.
Thanks,
PythnutD
Awesome and thanks!
ReplyDeleteThis blog is great. I really appreciate how much work you put into these posts since I struggled with assembling UEDF models. The hip joints for destroids are tough to get right and veritechs arms frustrate me. How do you line up the veritech's arms if you glue on one at a time? Any tips to getting the destroids legs right?
ReplyDeleteThe arms are arranged on the sprue so that the arms that fit together are next to each other. Took me a full batch to realize that the arms were matched this way and that the grooves in the gun/hand fits not only the arm but can be used as a guide to how to place the arm on the body, then you can adjust the left arm as needed to fit. I always test the fit before I glue to make sure they are aligned correctly.
Delete